Since importing User profiles from AD using Forefront Identity Manager Sync Service is problematic and buggy, SharePoint 2013 includes a new type of import which bypasses the Forefront Identity garbage all together and directly imports from AD. The upside of this approach is that the import is blazing fast and the down-side is that it can be done only one-way. However, a one-way import is more than sufficient for most environments.
In this post i am going to show the steps involved in configuring and running the AD Direct import -
1. The first thing is to make sure that you have a User Profile Service Application provisioned and running. If it's not then you will have to create one and make yourself the Administrator of the same.
2. Once the User Profile Service Application is ready, click on the Manage button under Application Management and Manage Service Applications to come to the list of service applications. Scroll down and click on the User Profile Service Application.
3. Doing step 2 should bring us to the "Manage User Profile" page.
4. On this page, under the second heading called "Synchronization", click on the "Configure Synchronization Settings" link.
5. In the page that follows, scroll down to Synchronization Options and select the second radio button labelled "Use SharePoint Active Directory Import". Now scroll all the way down and click the OK button.

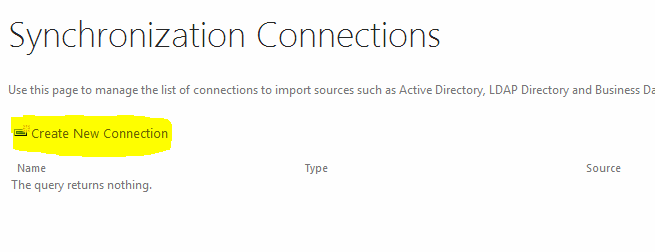
6. Now go back to the User Profile Settings page and click on "Configure Synchronization Connections" under the Synchronization heading.

You will see a page that shows all the connections. If this is the first time, then there will be no connections. Now click the "Create New Connection" link.
 7. In the "Add New Synchronization Connection" page enter the Domain details and the Sync Account name and password. The Sync account is a service account having "Replicate Directory Changes". I created a service account called "spupsync" and gave it "Replicate directory changes" permission.

On the page, scrolldown a bit and click on the "Populate Containers" button. If the User account has rights and everything is alright with your AD then you should see the Domain name (NETBIOS name) populated. Now expand and uncheck everything except users.

Finally press "OK" button on this page. You should then be able to see the newly created connection.
8. Now create the "Synchronization Timer Job" by first clicking on "Configure Synchronization Timer Job" on the main User Profile Settings page. Then chose the correct import interval (i chose once every day) and click ok.

9. Finally start the Profile Synchronization by clicking on the "Start Profile Synchronization" link. This will run the Synchronization Timer Job and pull the user details from AD very quickly.
Here are some limitations of direct AD Import -
1. Sync in one-way (Import only)
2. We cannot map AD attributes to "System" SharePoint Profile properties
3. We cannot map two different AD properties to the same Profile property
4. We cannot do cross string type mappings (a value string attribute to a multi value string property or vice versa)
In this post i am going to show the steps involved in configuring and running the AD Direct import -
1. The first thing is to make sure that you have a User Profile Service Application provisioned and running. If it's not then you will have to create one and make yourself the Administrator of the same.
2. Once the User Profile Service Application is ready, click on the Manage button under Application Management and Manage Service Applications to come to the list of service applications. Scroll down and click on the User Profile Service Application.
3. Doing step 2 should bring us to the "Manage User Profile" page.
4. On this page, under the second heading called "Synchronization", click on the "Configure Synchronization Settings" link.
 |

You will see a page that shows all the connections. If this is the first time, then there will be no connections. Now click the "Create New Connection" link.
On the page, scrolldown a bit and click on the "Populate Containers" button. If the User account has rights and everything is alright with your AD then you should see the Domain name (NETBIOS name) populated. Now expand and uncheck everything except users.
Finally press "OK" button on this page. You should then be able to see the newly created connection.
8. Now create the "Synchronization Timer Job" by first clicking on "Configure Synchronization Timer Job" on the main User Profile Settings page. Then chose the correct import interval (i chose once every day) and click ok.
9. Finally start the Profile Synchronization by clicking on the "Start Profile Synchronization" link. This will run the Synchronization Timer Job and pull the user details from AD very quickly.
Here are some limitations of direct AD Import -
1. Sync in one-way (Import only)
2. We cannot map AD attributes to "System" SharePoint Profile properties
3. We cannot map two different AD properties to the same Profile property
4. We cannot do cross string type mappings (a value string attribute to a multi value string property or vice versa)


No comments:
Post a Comment